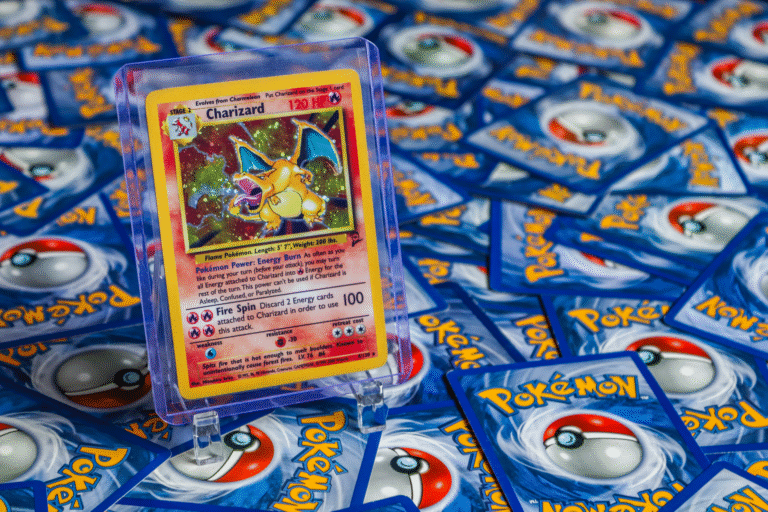
The key to lighting a Pokémon card display is using focused, directional light at the right color temperature and intensity to bring out the card’s colors and details without creating glare or heat damage. Most collectors overlook lighting entirely, which means their prized cards—particularly high-grade holos and rares—never show their true visual appeal. The difference between a poorly lit card and a properly lit one is dramatic: a holo Charizard under dim, warm household lighting looks flat and unremarkable, but under 4000K-5000K LED light positioned at a 45-degree angle, the same card’s surface texture, foil patterns, and color saturation become significantly more visible.
Effective card lighting requires balancing three technical factors: light color temperature (measured in Kelvin), intensity (measured in lumens), and positioning. You’re not trying to create a stage light—you’re trying to create the conditions where a card’s details become visible without degrading the card over time. This means avoiding heat-producing incandescent bulbs, managing UV exposure, and being thoughtful about glare and shadows on the display surface.
Table of Contents
- What Light Color Temperature Works Best for Pokémon Cards?
- LED vs. Halogen vs. Incandescent: Which Light Source Should You Use?
- Positioning and Angle: How to Avoid Glare and Shadows on Your Cards
- Brightness Levels and Lumens: Getting the Intensity Right
- UV Exposure and Long-Term Card Protection
- Display Case Materials and Light Interaction
- Future Technology and Emerging Display Trends
- Conclusion
- Frequently Asked Questions
What Light Color Temperature Works Best for Pokémon Cards?
Color temperature is where most collectors make their first mistake. Warm light (2700K) is cozy for living spaces but makes card colors appear muted and yellow-tinted, which obscures the vibrant reds, blues, and yellows that give cards their visual appeal. Cool white light (5000K-6500K) is closer to daylight and shows card colors more accurately, but it can feel harsh and clinical. The sweet spot for Pokémon cards is 4000K-5000K, which is called “neutral white.” This temperature range mirrors natural daylight without the harshness of cooler temperatures, and it reveals holo patterns and color gradients without appearing artificial.
A practical example: an unlimited edition Blastoise with a holo pattern looks genuinely different under 2700K versus 4500K lighting. Under warm light, the holo appears dim and the card’s blue coloring seems dull. Under neutral white, the same card’s holographic pattern becomes crisp and the blue deepens noticeably. LED strips and panel lights labeled as “daylight” or “cool white” typically fall into the 5000K-6500K range, which is also suitable, though slightly cooler than ideal. The 4000K-5000K range is easier to find in quality LED fixtures and provides a more balanced look.
LED vs. Halogen vs. Incandescent: Which Light Source Should You Use?
Incandescent bulbs are the wrong choice for card displays. They produce significant heat—a 60-watt incandescent bulb can raise the temperature of a small enclosed display case by several degrees—and heat accelerates card degradation by promoting ink fading and potential holofoil separation over years of exposure. They also have a warm color temperature (2700K) that doesn’t showcase cards well. Halogen bulbs are slightly better on temperature (closer to 3000K-4000K) but still produce substantial heat and can create UV issues if unfiltered.
LEDs are the clear winner because they produce minimal heat, offer accurate color temperatures, and consume far less electricity. An LED strip rated for 4500K can run for hours without raising the ambient temperature in a display case. The limitation with LEDs is that cheaper units often have poor color rendering, meaning the light might be technically 4500K but the actual spectrum isn’t balanced across all colors. A $15 LED strip from a generic brand might make reds appear muted while oversaturating blues. Investing in mid-range LED lighting—$30-60 per fixture—from reputable makers like Nanoleaf, BenQ, or quality architectural LED suppliers ensures you’re getting true color representation.
Positioning and Angle: How to Avoid Glare and Shadows on Your Cards
The angle and distance of your light source dramatically affects what you see. Directly overhead lighting (90 degrees) creates harsh shadows under any raised card elements and can create glare on holos that makes them harder, not easier, to see. Light positioned at 45 degrees to the card surface—coming from above and to the side—reveals texture and holo patterns while minimizing harsh glare. Distance matters equally: light that’s too close (within 6 inches) creates hot spots and shadows, while light that’s too far (beyond 24 inches) requires higher intensity to be effective.
For a slabbed PSA or CGC card in a standard case, positioning a light source 12-18 inches away at a 45-degree angle typically produces the best results. If you’re using a shelf display with multiple cards in a row, two light sources—one on each side—prevents uneven lighting. A warning: angling light too steeply (closer to perpendicular to the case front) can cause significant glare that makes the card face hard to see, especially if you’re using a glass front. Testing different positions with your actual lighting setup takes 15 minutes and is worth the effort before you finalize your display layout.

Brightness Levels and Lumens: Getting the Intensity Right
Card displays don’t need extreme brightness. A typical room has ambient lighting around 300-500 lux (a measure of light falling on a surface). A well-lit card display should have 500-1000 lux of focused light to make details visible without being so bright that it’s uncomfortable to look at for extended periods. This is roughly equivalent to a 40-60 watt equivalent LED bulb in a concentrated area, not the 150+ watts you might use to illuminate a workspace.
The trade-off is between visibility and the viewing experience. At 1500+ lux, cards are maximally detailed but the light becomes tiring to look at and can feel like you’re viewing museum artifacts under interrogation-style lighting. At 300-500 lux, the display is comfortable to view but subtle details in holo patterns may not be fully visible. Most collectors find 700-900 lux to be the balance point where card details become clear but the overall experience remains pleasant. A simple lux meter app on a smartphone (available free on iPhone and Android) lets you measure this quickly.
UV Exposure and Long-Term Card Protection
This is where many lighting setups fail without the collector realizing it. Some LED strips, particularly cheap or older fluorescent tubes, emit small amounts of UV light that can fade card colors over months and years. A card displayed under UV-emitting lights will show visible color fading that won’t be obvious immediately but becomes apparent when you compare it to an identical card stored in darkness. High-grade cards—those graded 8 or higher—are particularly vulnerable because the inks are often original and more susceptible to UV degradation.
Purchase LED lighting explicitly rated as “UV-free” or “no UV emissions.” Quality LED strips and panels from established manufacturers will have this specification listed. If you’re using any lighting with an unknown history (salvaged fixtures, very old units), or if your display area gets direct sunlight, supplement with UV-filtering acrylic or polycarbonate sheet (available from hardware stores). A warning: don’t use regular glass or cheap acrylic for UV protection—you need true UV-blocking acrylic (usually marked as UV-99 or similar). A $20 sheet of UV-blocking acrylic will protect a display far better than years of replacing faded cards.
Display Case Materials and Light Interaction
Glass cases offer the clearest view but create glare problems if light hits them at certain angles. Acrylic diffuses light slightly and reduces glare but can yellow over time if exposed to UV, becoming a yellowish barrier between viewer and card. For lit displays, semi-transparent diffusion panels (like frosted acrylic) positioned between the light source and the cards can soften harsh shadows without darkening the overall image.
These panels cost $10-20 and are worth testing if your current setup creates unwanted shadows. An example: a slab-only display using clear acrylic with side lighting can often avoid glare issues altogether because light doesn’t reflect back through the front. In contrast, a display case with a glass front and overhead lighting will almost certainly have glare spots that need correction through angle adjustment or diffusion panels.
Future Technology and Emerging Display Trends
As LED technology continues improving, smart lighting systems that adjust color temperature throughout the day (mimicking natural light shifts) are becoming more affordable. Some collectors are experimenting with programmable RGB systems that let them adjust color temperature seasonally or for photography, though this adds complexity that isn’t necessary for basic card preservation and viewing.
The trend is toward integrated lighting solutions—cases designed with built-in, filtered LED strips that eliminate the problem of retrofitting lighting. Regardless of whether you invest in basic strips or advanced systems, the fundamentals remain: neutral white temperature, minimal heat, focused directional light at 45 degrees, and UV protection. As Pokémon card collecting continues to evolve, better-lit collections will not only look dramatically better but preserve card value more effectively over the long term.
Conclusion
Lighting a Pokémon card display effectively requires three core decisions: choosing 4000K-5000K LED lighting, positioning it at 45 degrees and 12-18 inches away, and maintaining 700-900 lux of intensity while ensuring UV protection. These choices reveal the card’s colors, holo patterns, and details without creating glare, harsh shadows, or heat damage. The investment is modest—a quality LED strip costs $30-60—but the visual difference is immediately obvious.
Start by measuring your current display’s ambient light with a free lux meter app, then add focused LED lighting in a single 45-degree position. Observe the results for a week to see if you need a second light source or angle adjustment. Test UV protection if your setup includes any uncertainty about light source quality. This approach takes a few hours to implement but transforms how your collection looks and, more importantly, protects your cards from degradation over years of display.
Frequently Asked Questions
Will LED lights heat up my display case enough to damage cards?
No. Quality LEDs produce negligible heat compared to incandescent or halogen bulbs. Even running an LED light continuously will raise display case temperature by less than 2 degrees Fahrenheit, which is insignificant for card preservation.
Can I use regular household LED bulbs from the grocery store for card lighting?
You can, but most are labeled 2700K (warm white) and won’t show card colors well. Look specifically for bulbs labeled 4500K-5000K (daylight or cool white). Avoid the cheapest options, as color accuracy suffers.
How close can I position a light to a card without causing damage?
Six inches is approximately the minimum distance to avoid hot spots and harsh shadows. Twelve to eighteen inches is optimal for most displays. Closer than six inches risks concentrated heat and creates uneven lighting.
Do I need to worry about card damage if I light my display 24/7?
If you’re using quality UV-free LEDs, there’s minimal risk from the lighting itself. The bigger concern is UV from incidental sunlight in the room, which is why UV-blocking acrylic is worth using if your display gets any natural light.
What’s the difference between lumens and lux?
Lumens measure total light output from a source. Lux measures how much light actually falls on a surface. For card displays, lux is more relevant because it tells you how bright the card itself appears to a viewer.
Can I use a smartphone camera to check if my lighting is good?
Yes. Photograph your cards under different light setups and compare the images. Photos often reveal glare, shadows, or color issues that aren’t obvious to the naked eye. This is a useful way to test before finalizing your setup.