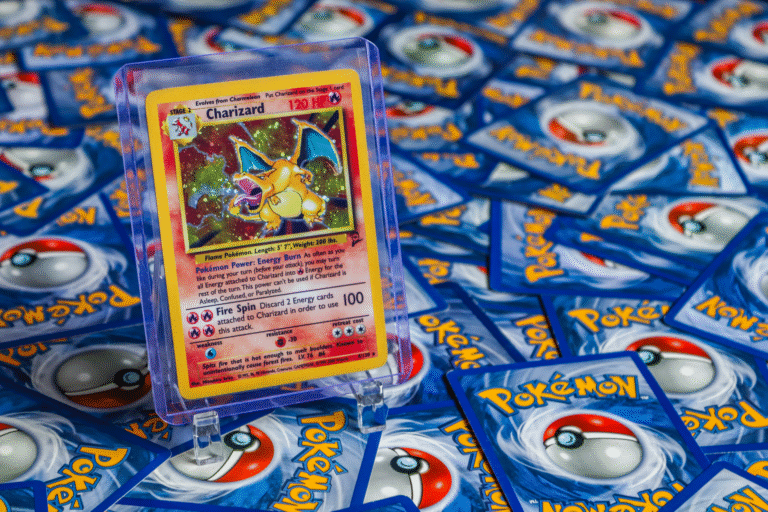
Cracking a PSA-graded Xerneas slab without damaging the card requires a patient, methodical approach focused on carefully separating the acrylic case from the card inside. The most effective technique involves using a thin plastic tool or shim to gently pry open the slab at its seams rather than applying force from the top, which risks bending or creasing the card. For example, collectors have successfully used old credit cards, playing cards, or specialized slab-cracking tools inserted horizontally along the edges where the two halves of the slab meet, slowly working around the perimeter to break the seal rather than forcing the case open at a single point.
The fundamental principle is that PSA slabs are glued together, not locked, so your goal is to gradually weaken the adhesive bond by applying steady, lateral pressure at the seams. The entire process typically takes 15 to 30 minutes, and rushing it is the primary reason cards get damaged during removal. Most successful extractions involve going slowly and accepting that it may take multiple sessions of gradual pressure before the case finally separates.
Table of Contents
- What Tools Are Needed to Extract a Card from a PSA Slab?
- The Detailed Extraction Technique and Why Patience Matters
- Protecting the Card During and After Removal
- Comparing Slab-Cracking Methods and Their Tradeoffs
- Common Pitfalls and What Can Go Wrong During Extraction
- When Cracking a Slab Makes Financial Sense
- Future Outlook for PSA Slabs and Card Grading Standards
- Conclusion
- Frequently Asked Questions
What Tools Are Needed to Extract a Card from a PSA Slab?
The essential tools for safe slab cracking are minimal but specific. A thin, flexible implement is crucial—options include an old credit card, a plastic library card, a butter knife with rounded edges, or specialized slab-opener tools designed specifically for this purpose and available from online card-collecting retailers. some collectors prefer playing cards layered together to create a slightly stiffer tool, while others use plastic shims or even dental picks, though dental picks can be too aggressive if not handled carefully. The location where you apply the tool matters significantly.
PSA slabs typically have a small gap where the front and back acrylic panels meet, usually along one edge of the slab’s perimeter. Running your tool along this seam in a horizontal, sliding motion applies pressure to the adhesive without leverage stress that could bend the card. Working your way around all four edges, rather than focusing on just one corner, distributes the force and prevents warping. Many collectors wrap their thin tool in cloth tape to reduce the risk of it slipping and scratching the acrylic or damaging any edge of the card.

The Detailed Extraction Technique and Why Patience Matters
The mechanics of safe extraction involve inserting your thin tool horizontally into the seam between the acrylic panels, then slowly sliding it back and forth in small motions rather than trying to pry the panels apart. This sliding motion weakens the adhesive bond gradually, similar to using a saw rather than a crowbar. Start at one corner of the slab and work methodically around the edges, spending a few minutes at each section. The adhesive on PSA slabs is strong, so expect to go around the slab multiple times, each pass widening the gap incrementally.
A critical limitation of this method is that it requires genuine patience and accepting that aggressive attempts to speed up the process almost always result in either a bent card or a bent slab that can no longer house the card cleanly. Some collectors report that working the tool along the same seam repeatedly in slow passes, with breaks in between, eventually succeeds even when initial attempts seemed unsuccessful. Once you’ve worked your way around the slab 5-10 times, you may hear or feel a subtle “give,” indicating the adhesive is failing. At this point, gentle lateral pressure applied evenly on opposite sides of the slab can complete the separation without damage.
Protecting the Card During and After Removal
Once the slab begins to separate, you face the delicate moment of actual extraction. The card inside should not be pried or pulled suddenly; instead, as the gap widens, gently wiggle the card within the slab rather than pulling it out. Some collectors place the slab on a flat, soft surface (like a mousepad or yoga mat) and use one hand to hold the slab steady while the other hand guides the card out slowly as the gap widens.
The card’s edges are most vulnerable during this phase, so supporting the card horizontally rather than letting it rotate is essential. Once removed, the card itself may require cleaning, as it often has adhesive residue or dust accumulated inside the slab. A microfiber cloth can gently remove loose particles, but do not use liquids or aggressive rubbing on PSA-graded Xerneas cards, as the ink and surface finish can be sensitive. Allow the card to rest on a clean surface for several hours before handling it further to ensure any moisture from your hands or the extraction process has dissipated completely.
Comparing Slab-Cracking Methods and Their Tradeoffs
Several approaches exist beyond the standard sliding-tool method. Some collectors use a hobby utility knife with a flat blade, running it very carefully along the seam, though this method carries higher risk of accidentally scratching the card or acrylic if the blade slips. Others have tried freezing the slab in a refrigerator to make the adhesive brittle, then attempting extraction, but this method is unpredictable—some report success, while others find it makes the acrylic more prone to cracking.
The advantage of the slow, patient, thin-tool approach is its reliability and low risk to the card itself, though it requires significant time investment. Faster methods save time but introduce risk that isn’t worth taking on a valuable card. A Xerneas card with a high PSA grade represents considerable monetary value, and the cost of the extraction tool or the time spent is negligible compared to the potential loss from a damaged card. If you own a card worth $100 or more, the slow method is virtually always the correct choice.
Common Pitfalls and What Can Go Wrong During Extraction
The most frequent failure point is the bent card, which occurs when lateral pressure is applied unevenly or when the card is pulled rather than guided out. Even a very slight bend is often visible to the naked eye and significantly reduces a card’s value. A second common issue is adhesive residue left on the card or slab edges, which can be stubborn to remove without risking the card’s surface. This residue is essentially impossible to clean off the acrylic without leaving streaks, and it’s nearly impossible to clean off the card without risk of damage.
Another limitation that collectors often underestimate is the psychological challenge of the slow process. Knowing you’re working on a valuable card creates pressure to rush or apply more force when progress seems slow. Setting a timer, taking breaks, and mentally committing to the slow approach from the start helps overcome this. If you find yourself increasingly frustrated or tempted to use more force after 30 minutes, it’s better to stop, place the slab in a safe location, and resume the next day with fresh patience.

When Cracking a Slab Makes Financial Sense
Collectors typically crack slabs for a few specific reasons, each with different financial implications. If you own a high-grade Xerneas card in a slab and believe it would grade higher with a different grading company, cracking and resubmitting makes sense—though you’ll pay resubmission fees and assume the risk that it grades the same or lower. If you purchased a card in a slab and now prefer to store it in a different protective case, cracking allows you to upgrade to newer storage methods without the card itself leaving your hands.
The least economically sound reason to crack a slab is selling the card raw when it’s currently slabbed, since most buyers prefer authenticated slabs and will pay more for them. If your goal is to resell a Xerneas card, keeping it slabbed almost always yields a better return. Cracking slabs makes most sense when you intend to keep the card as a personal collection piece and prefer it in a different format, or when you have a specific reason to believe regrading will improve its grade and value.
Future Outlook for PSA Slabs and Card Grading Standards
The collectible card market continues to evolve, and some collectors speculate about future trends in slab design that might make extraction easier or unnecessary. However, PSA’s current slab design has remained essentially unchanged for years, and the company shows no signs of modifying it in ways that would accommodate easy removal.
If you’re deciding whether to crack a slab now or hold onto it slabbed, consider that your future self might face the same decision with the same risks. Looking forward, newer grading standards and companies may emerge, but PSA remains the market standard for Pokémon cards, especially vintage and high-value specimens like premium Xerneas cards. Before cracking any slab, ensure you’ve thought through what you’ll do with the card afterward and whether slabbed really was the problem in the first place.
Conclusion
Cracking a PSA slab without damaging the card is entirely possible through patient, methodical use of a thin plastic tool applied horizontally along the slab’s seams, working slowly around the perimeter and avoiding sudden force. The key is accepting that the process takes time and that rushing any step significantly increases the risk of a bent card or other damage that reduces the card’s value far more than any extraction tool costs.
Before you crack a slab, ensure you have a clear reason for doing so and have accepted the risks involved. For most valuable cards like high-grade Xerneas specimens, keeping them slabbed is usually the better choice, as it preserves authentication and typically commands higher resale prices. If you do proceed with extraction, set aside adequate time, gather the right tools, and approach the work with genuine patience.
Frequently Asked Questions
How long does it actually take to crack a PSA slab without damaging the card?
Expect 15 to 30 minutes for a successful extraction. Rushing the process is the primary cause of damage, so if you’ve been working for 30 minutes without success, take a break and resume the next day rather than applying more force.
Can I use heat or solvents to weaken the adhesive on a PSA slab?
Heat is not recommended, as it can warp the acrylic and create condensation inside the slab before extraction. Solvents risk damaging the card’s ink and finish. The slow mechanical method is safest.
What should I do with the empty PSA slab after removing the card?
Empty slabs have very limited market value. Most collectors keep them as placeholders or discard them. Attempting to sell an empty slab separately rarely yields meaningful returns.
Will cracking a PSA slab and keeping the card raw significantly reduce its value?
Yes. A slabbed card typically sells for 20-50% more than the same card raw, especially for valuable cards. Unless you have a specific reason to remove the card, the slab usually adds value.
What if the slab breaks or cracks during extraction?
If the acrylic itself breaks, the card is no longer authenticated by PSA, and you’ll need to decide whether to resubmit it to PSA or another grader, or sell it as raw. An acrylic crack doesn’t damage the card itself, but it destroys the slab’s protective value.